CDA Buying Advice – How to install your American fridge freezer
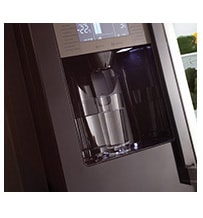
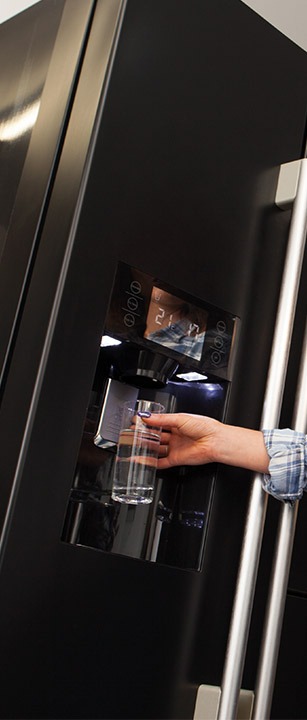
Plumbing your automatic water and ice dispenser straight into your mains water supply is a convenient way to ensure a constant and accessible supply of chilled, filtered water & refreshing ice to your kitchen whenever you need it.
Models that do not require plumbing in, that can be manually filled, are available but require more ongoing maintenance to ensure a continuous supply of chilled water and ice.
- Before you start on any installation, it is recommended that you leave the appliance to settle for at least 24 hours. The compressor inside the appliance needs to contain oil to work effectively, which may have been disturbed during transit. Leaving the appliance to settle allows the oil time to return to the compressor inside.
- Wondering what to do with that time before you can get the shopping in and put away? It is a good time to give your appliance a quick clean to get rid of any odours that may have developed while the appliance has been stored & delivered. A quick wipe over with a solution of bicarbonate of soda and water will do the trick. We recommend that you dry the interior thoroughly afterwards. Any residual odour will disappear once the appliance is switched on and has cooled down.
- Before you connect the water inlet pipework, turn off the water supply.
- You will need to connect a water filter to the water inlet, this filter will need changing at approximately 6 month intervals. To connect this, firstly measure out the required length of pipe to reach from the water supply to the fridge freezer. Make a square cut to the pipe with a sharp knife. Next, decide where you would like to position the filter and cut the pipe to accommodate this.
- The pipe can be ‘push-fitted’ to the ends of the water filter and secured with locking clips*. Then connect the inlet end of the pipe to the plastic adaptor provided and screw onto a suitable ½ inch BSP connector water outlet.
- Connect the appliance end of the pipe to the appliance at the water valve assembly and push the pipe into the connection. There are a range of fittings including ‘T’ style, tap, locking clip, washers and ‘O’ rings to ensure that you can achieve a secure connection to the water supply.
- Once you are happy with the connection, seal all the threaded joints with the PTFE tape included
- Turn your water supply back on.
- Now you are ready to run water through the dispenser to flush it out. Always check for leaks at this stage to prevent problems later on.
*full instructions and diagrams are available in our instruction manual.
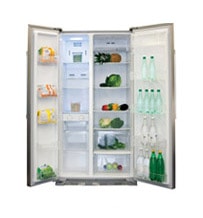
Does your fridge freezer require plumbing?
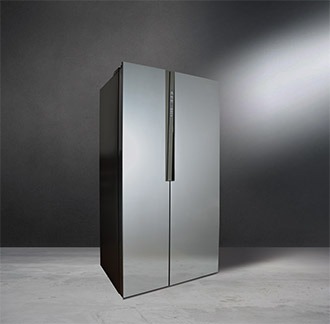
Your fridge or freezer will state whether it requires plumbing into the water supply in the instruction manual. The CDA PC71 American style fridge freezer with ice and water dispenser does require connecting to the water supply.
Where to install my fridge freezer?
It is best to position your fridge freezer in a well-ventilated position that is away from heat sources, any dampness and direct sunlight. Make sure that there is a 10cm or larger gap above and to the sides of the appliance to make sure that there is enough ventilation around it and to make sure that there is enough room to open the doors correctly. There must also be a 5cm gap at the back of the appliance for ventilation. Allowing air to circulate effectively around your appliance means that it is able to work efficiently, release warm air effectively and can also prevent unnecessary breakdowns.
How do I install a water line for my fridge?
Follow our step by step instructions to install a water line to your fridge. From the basics, like switching off the water supply, to the types of connection available to you we go through the steps one by one in this guide on how to get your appliance plumbed in and ready to dispense chilled water and ice in your kitchen. For specific advice that is tailored to your appliance, please refer to the instruction manual supplied with your appliance.
How do I install an ice maker?
Once the water supply is connected to the appliance your ice maker will also be ready to go. Simply switch the ice maker on using the on/off switch. The ice making process will take about 2 hours. Your ice maker will continuously and automatically make ice now until the compartment is full. When you dispense ice into a glass, your ice maker will automatically refill the compartment for you.
How easy is it to connect my American fridge freezer?
Although some of the terms for the connectors and valves might be unfamiliar to most of us, the process of installing your ice and water dispenser is quite straightforward. Your kitchen installer will of course be able to do this for you but if you fancy having a go yourself, our technical team are always on hand to offer advice over the telephone. You can refer to the diagrams in the PC71 instruction manual and contact the team on 01949 862012.